When we read files or view images on the Internet, we often see a watermark in the middle or at the bottom of the file, telling you where the file or image comes from, and who owns the copyright. These logos, whether they are images, stamp, or texts, are collectively referred to as watermarks and are used to protect the copyright of documents in case they are stolen by others and cause infringement.
Although PDF files are not easy to be edited and copied by others, as long as the other party uses a PDF editor or other tools, the contents of your files can be easily obtained. So the safest way is to encrypt the file or add your own watermark (name or image of a person/company/organization, etc). What's more, you can adjust the additional options such as transparency and location according to your needs, so that others can only read it and clearly see the file's ownership.
We have chosen and selected four different ways to add watermarks to PDF files. Keep reading and pick one that you like.
Contents
Method One - Watermark A PDF with iLovePDF
Method Two - Watermark A PDF with LightPDF
Method Three - Add A Watermark with Adobe Acrobat Pro
Method One - Watermark A PDF File with iLovePDF
iLovePDF Online PDF Editor & Converter has a professional Watermark tool that allows you to add watermarks to PDF files freely and easily. It can help you customize the color, font, transparency, size, rotation and position of the watermark, also the pages that you want to add to, which make your PDF files more professional and won't be stolen and copied easily. What's more, you can select the layer (over or below the PDF content) to decide whether it can just be printed or viewed.
Step 1. Go and visit iLovePDF Add watermark.
Step 2. Upload your PDF file. Here you have two ways to upload files. One is to select your file from the local computer or drag and drop it into the corresponding table. The other is to upload it from your Google Drive or Dropbox account.
Step 3. Now you can start to customize the watermark. Place text & image are nearly the same, one is to add text and another is to add images. So first of all, you need to fill in the text of the watermark. Then select the appropriate Text format according to your needs.
Step 4. When you select the location of the watermark, it is operated on a nine-square grid, and you can also see that there is a red dot on each page of your PDF file. Click on the different positions in the nine squares grid then you will see that the red dots will also change. Then comes to transparency and rotation.
Step 5. After that, you need to choose the range to add the watermark and also the layer, and finally click Save.
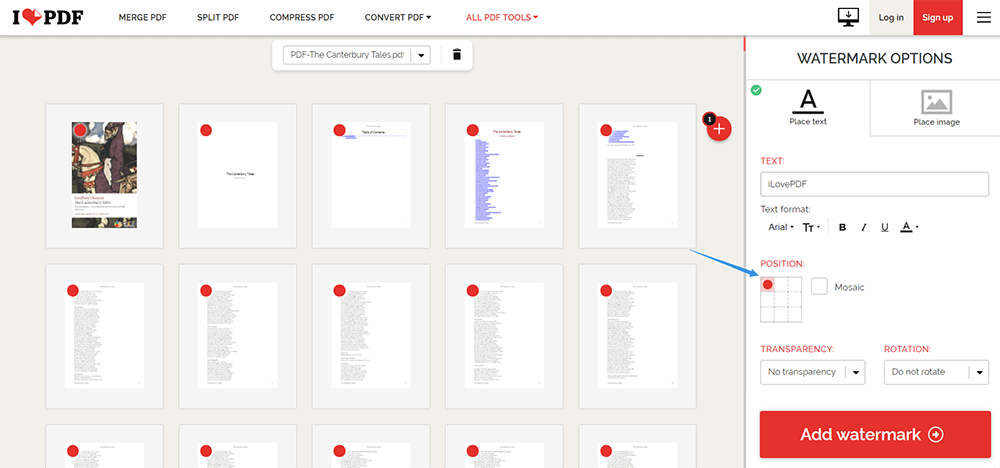
Step 6. Download your PDF file or save it to Google Drive and Dropbox.
Method Two - Watermark A PDF with LightPDF
LightPDF Watermark PDF is another PDF editor that allows you to add watermarks online. Like iLovePDF, it allows users to work with PDF files according to their needs, so you can also see that it also has many different PDF tools on its homepage. The difference between LightPDF and iLovePDF is that its operation is relatively simple and the options are clearly arranged, and users can add watermarks very quickly. It allows users to make changes in text, font, color, size, position, placing layer, transparency of watermarks.
Step 1. Launch LightPDF Watermark PDF.
Step 2. LightPDF only allows users to upload files from the local computer, so you can just only click the Choose file button to upload your PDF file.
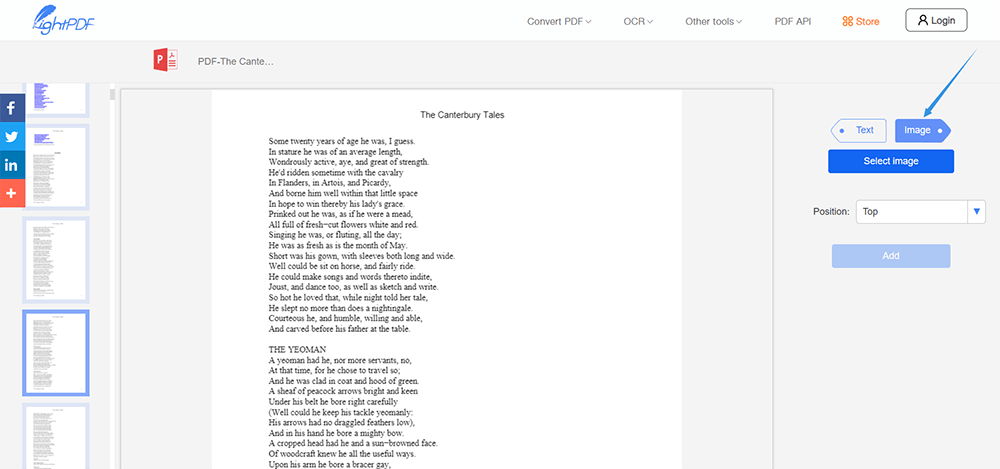
Step 3. Select to insert Text or Image as your watermark. If you choose to select Text, like iLovePDF, here you need to enter the text, then select the font, size, color, position, layer, and transparency. But if you select Image, that it will be easier as you only need to select which image that you want to add and where you want to place it. Finally, click Add.
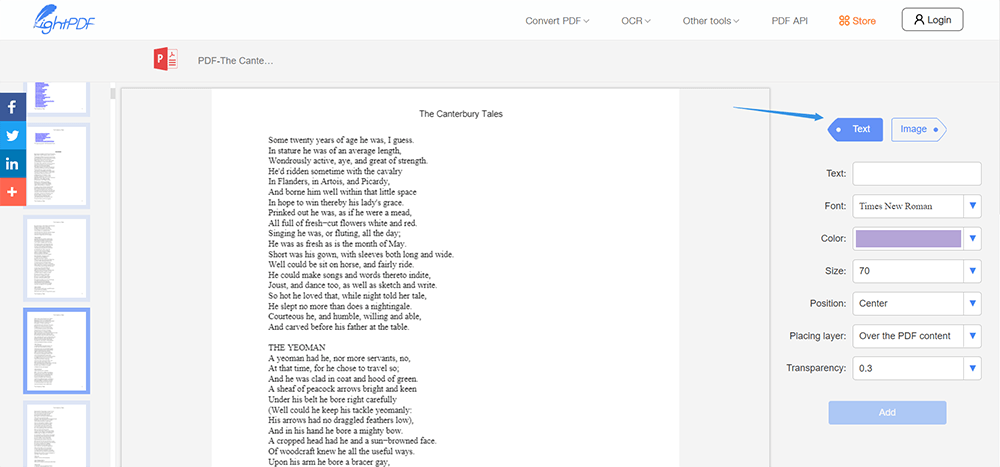
Step 4. The tool will tell you whether the processing is finished. Then you can click the blue arrow icon to download your PDF.
Method Three - Add A Watermark with Adobe Acrobat Pro
As the inventor of PDF, Adobe Acrobat is the most professional program. It's more complicated to operate than the two online tools we mentioned above. Its multiple functions can cover most of the needs of users, even some functions that are not commonly used, will also be provided by Adobe. For example, the angle of watermark rotation, whether it is 1 degree, 20 degrees, 50 degrees, you just only need to fill in the numbers. In addition, it is excellent and quite convenient that you can save your own watermark settings so that you can add them directly next time and no need to repeat settings.
Step 1. Run Adobe Acrobat Pro that installed on your computer. If you don't have this program, you can go to Adobe Acrobat Pro and apply for a free trial before purchasing it.
Step 2. Click on Edit PDF > Select a File. Then click Watermark > Add in the menu bar.
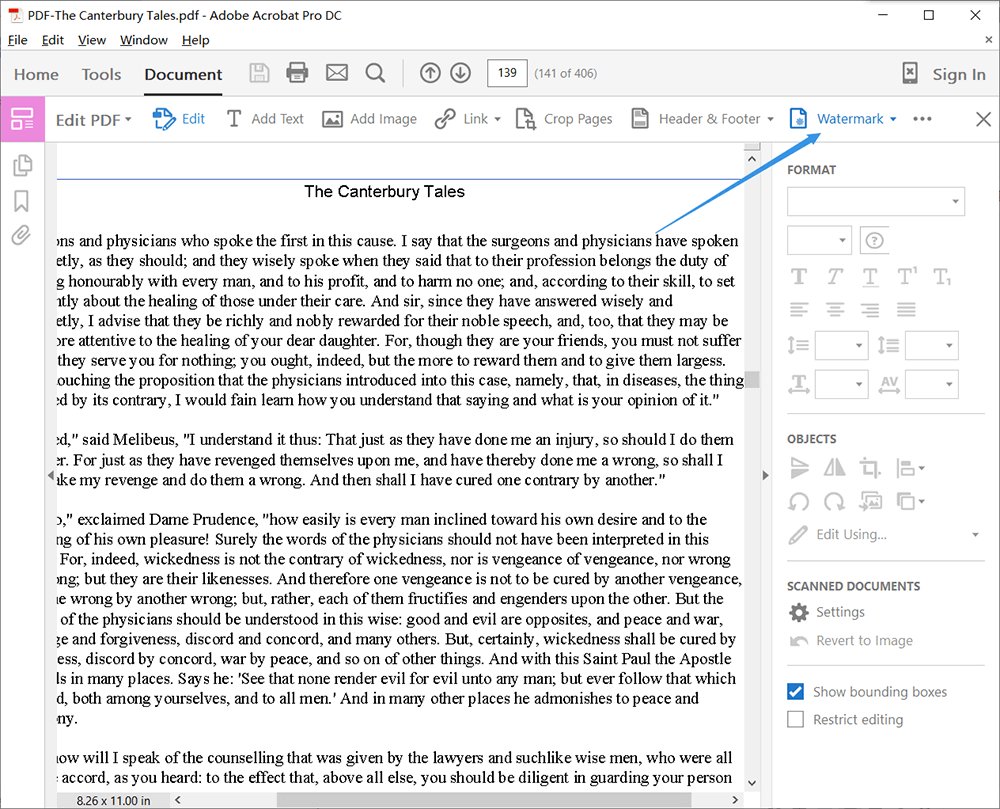
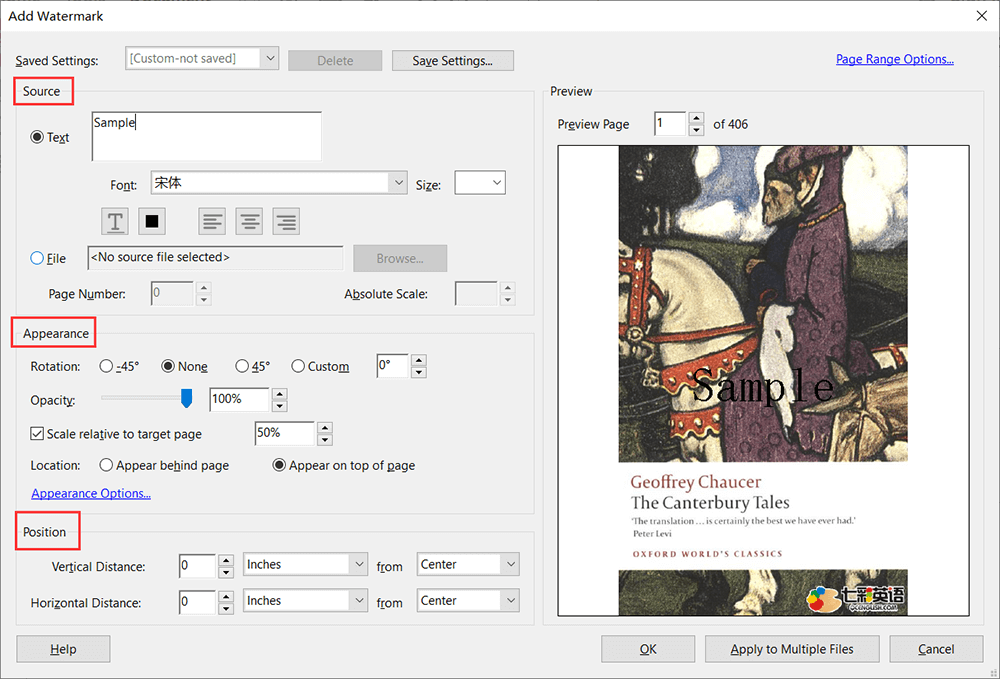
Step 3. There is a pop-out of settings to help you make the watermark. You can focus on Source, Appearance and Position only if you are the first time to use Adobe Acrobat. First we come to Source. Here we have Text and File (usually for you to upload a logo or image, or a page form a selected file). Then comes to Appearance for the settings of rotation, opacity and location. Here you can customize the angle of your watermark, which is so appreciative. And finally, select the Position. The watermark will be placed in the middle of the file by default, but you can move it up and down or left and right as you like.
Step 4. Now you can save your settings to avoid repeating the same manipulation the next time you use this function. Finally, click OK to add watermark to your PDF file and then press Ctrl+S to save your PDF file.
Method Four - Add Watermark to PDF Using Microsoft Word
If you are a Windows user, then you can use Microsoft Word to add a watermark to your PDF file. At the same time, edit your PDF file is also supported. Windows Microsoft Word has four templates that come with the system. If you only need to add words like "Confidential" and "DO NOT COPY", you can directly use the templates. Of course, customize the watermark is also provided.
Below we will briefly introduce three modes that Word has:
No watermark - Used to undo the watermark (if you add a watermark but are not satisfied or want to change the watermark, you can click this button to remove the watermark you just added).
Picture watermark - Add a picture or logo as a watermark, you can also choose to enlarge or reduce the size of your picture.
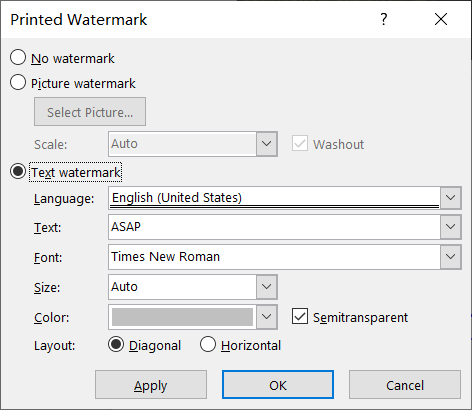
Text watermark - This option has a lot to select, such as language, font, text, color, size, and layout. But the only shortage is that you can only choose content from the text it provides.
Step 1. First of all, run Microsoft Word and open your PDF file.
Step 2. Select Design in the menu bar and then click Watermark. Now you can just select the templates that Word provided, or decide to customize your own watermark.

Step 3. We have already explained the difference between No watermark, Picture watermark and Text watermark, just select one of them to create your personalize watermark.
Step 4. Once you have done all the settings of the type of watermark that you want to add in your document, you can click Apply or OK to confirm your manipulation, and then the watermark will be put instantly as a transparent pattern on the page (if you have ticked Semitransparent).
Step 5. Click Save to keep your settings and save your PDF file.
Conclusion
The above is about how to add a watermark to a PDF file. We will update the new methods later. If you have good suggestions, please leave a message to us and let us know. Thank you for reading!
Was this article helpful? Thank you for your feedback!
YES Or NO