To organize the layout of a Word document to be clearer and easier for readers to view the content, people need to pay attention to several factors of the page organization. Not only the size and font of the words should be concerned, but also proper margins set for the whole page can matter a lot for presenting a good layout.
Every Word program can let users manage and change the margins of the document easily, like Microsoft Office and Google Docs. Today, Google Docs has been more popular because people don't need to download extra software but simply edit the Word documents in a browser online. This brings great convenience. And in this passage, I would like to share with you the ways on how to change the margins in Google Docs.
Contents
1. How to Change Page Margins in Google Docs Using Ruler
2. How to Change the Margins in Google Docs Using Page Setup
3. [Extended Reading] Why Do Many People Like Using Google Docs
1. How to Change Page Margins in Google Docs Using Ruler
Google Docs is such a convenient tool and provides really easy methods for us to change page margins for creating a more professional layout. Now we would first go through the way of using the ruler to change page margins in Google Docs within several simple clicks.
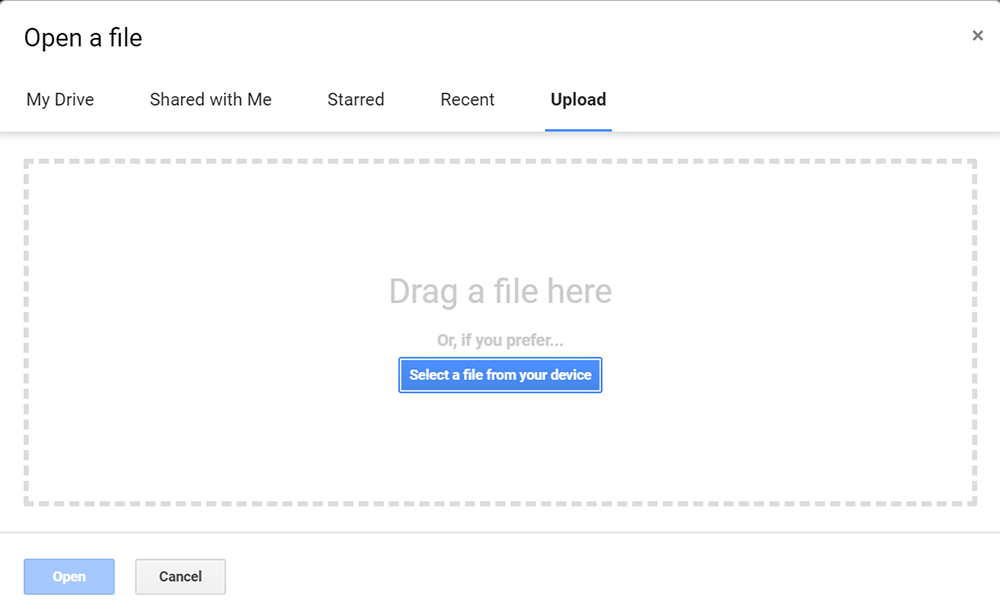
Step 1. Go to Google Docs using your web browser. You can choose to start a new document. Or if you want to change the margins of your existed Word, press the Open file picker, then navigate to the Upload section, and press Select a file from your device for adding it to Google Docs.
Step 2. Now as you are on the edition page of the Word document in Google Docs, you can easily notice the rulers on top and left sides of the page. The top ruler controls the left and right margins of the page, while the side ruler controls the top and bottom margins.
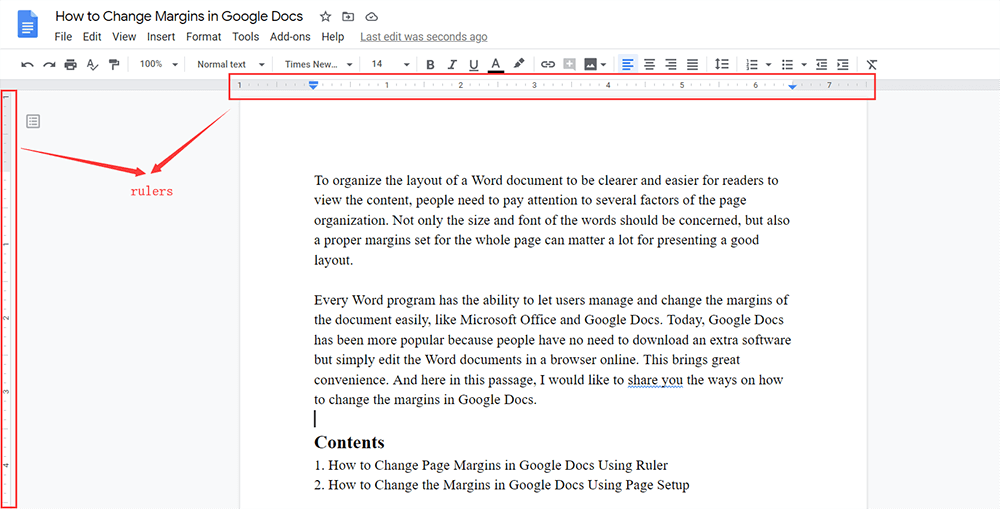
The ways between how to change vertical margins in Google Docs and how to change right and left margins in Google Docs are slightly different. So in the following, I will describe them separately.
How to Change Right and Left Margins in Google Docs
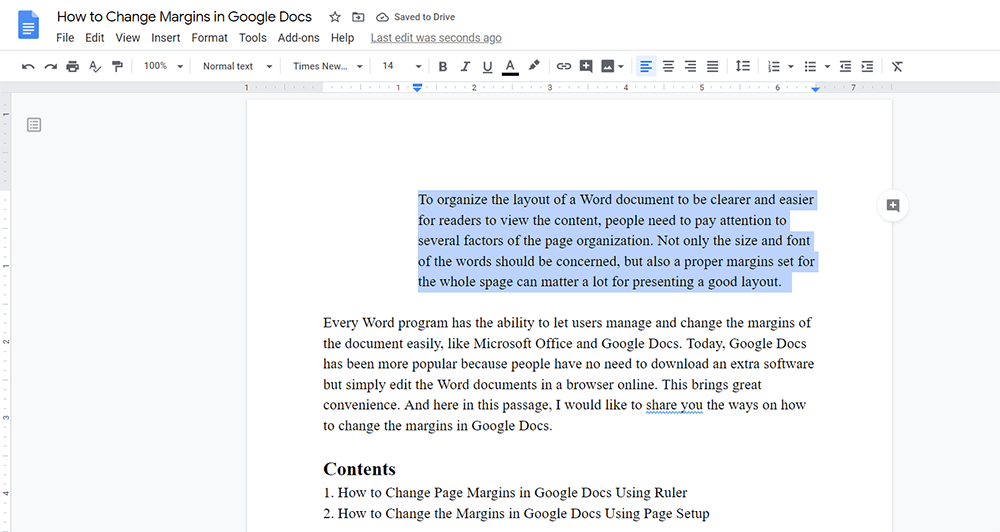
Step 1. For the right and left margins, people can select to change selected paragraphs. So firstly, you should select the paragraphs you need to change their margins.

Step 2. On the top ruler, there are two indentation indicators to let you control and change the margins of both left and right sides very easily. Directly drag them to the place you require.

Then the right and left margins can be simply changed.
How to Change Vertical Margins in Google Docs
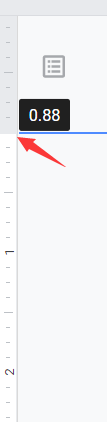
Turn to the left side on the side ruler. Notice that the side ruler doesn't set any indentation indicators, and unlike the top ruler, you can only change the vertical margins of the whole page. Therefore, directly drag to change the top and bottom margins of the page is all right.
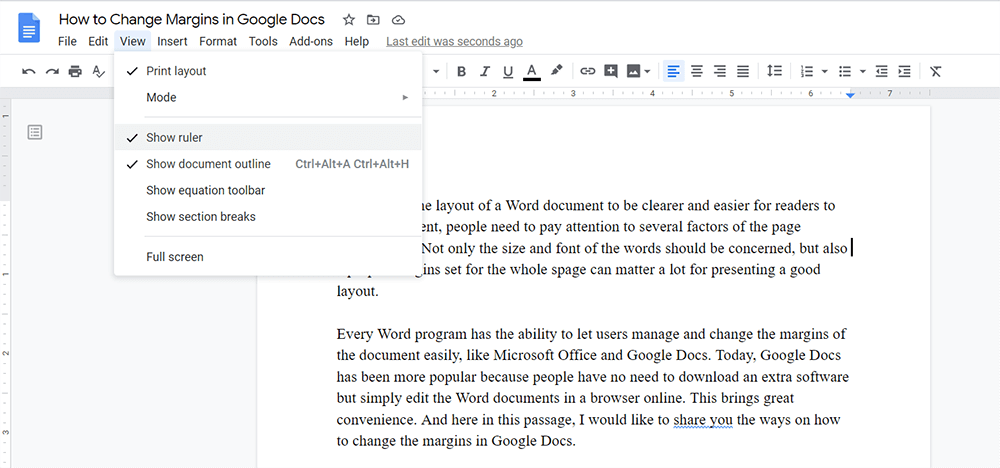
Sometimes, people will find that the rulers in Google Docs disappear from its toolbar. Under this situation, you can make them reappear again by going to View in the menu bar and enable Show ruler.
2. How to Change the Margins in Google Docs Using Page Setup
Another easier method to change all the margins more accurately, you can make full use of the Page Setup tool provided by Google Docs. But if you use Page Setup to set the margins, you can only set for the whole page instead of certain paragraphs. So how it works? I will show you now.
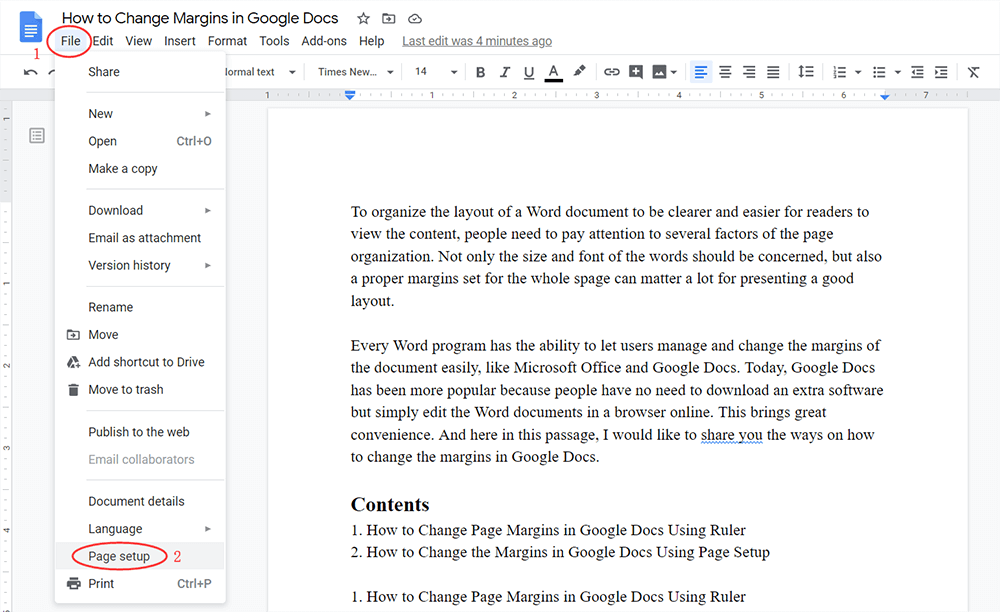
Step 1. In Google Docs, you should go to File in the menu bar. Then from the menu list, find the Page Setup option and hit it.
Step 2. Then the Page Setup dialogue will pop up. On the left column, you can set the Top, Bottom, Left, and Right margins with the accurate inches you need.
Step 3. When the data is set, press OK and the changes will be saved immediately.

3. [Extended Reading] Why Do Many People Like Using Google Docs
Why so many people enjoy using Google Docs for editing their documents today?
For selecting a tool to edit content, people are more likely to choose those programs which are easy-to-use and multifunctional. Google Docs wins many people's attractions for its web-based feature. Only with a browser, users can manage to do all professional editing on their Word content even without installing any software or extensions.
Also, although Google Docs is accessible online, this doesn't mean that its functionality is weaker than other document editing tools like Microsoft Word. Instead, it provides a variety of editing features for users to edit their documents pretty easily. Using Google Docs, you can still manage to create a professional and fantastic layout for your Word documents.
Don't worry that Google Docs will be incompatible with the Microsoft Word documents that have been created on your desktop before. Instead, you can directly upload a Microsoft Word file to Google Docs and then edit the content directly.
By login with your Google account, all the Google Docs documents can be saved on the cloud and are associated with your account. So when you change a device and log in with the same Google account, you can still access the Google Docs files you have created before. This brings even greater convenience.
Conclusion
Here are all about how to change margins in Google Docs! Both two methods are quite simple to follow. Just choose the way you think is convenient for changing the margins of your Word documents!
Was this article helpful? Thank you for your feedback!
YES Or NO