Modern life moves people's studies and works to desktops, and PDF becomes a common document format that many people have to use frequently. Are you a Mac user and you are wondering to seek a way to edit PDF freely on Mac? As we know, professional tools like Adobe requires expensive cost for using its Acrobat DC software to edit PDF. Fortunately, for Mac users, a built-in free tool, Preview, can be used for editing PDF without charge. Today, we will share the operations with you. Follow me and learn to use it!
Contents
How to Edit a PDF using Mac Preview How to Add Text to PDF on Mac How to Add a Signature to PDF How to Add Notes or Comments to a PDF How to Add Shapes to a PDF with Preview How to Rearrange or Add Pages to PDF on Mac How to Reduce Size of a PDF File
How to Edit a PDF using Mac Preview
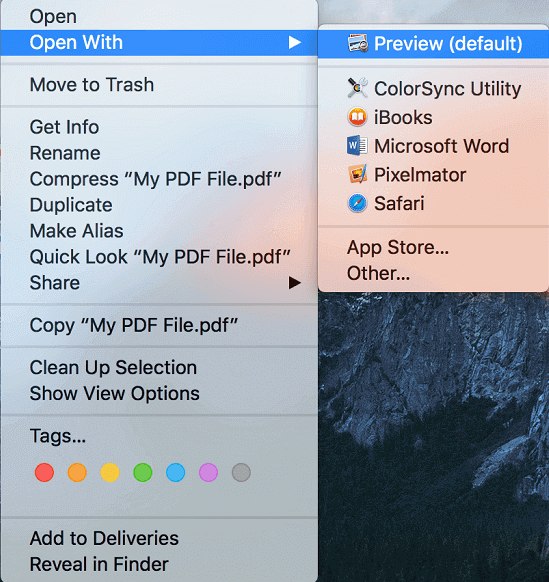
To open a PDF document with Preview on Mac, you are only required to right-click the document and select the Open with... option. You can find Preview in the menu. Simply tab it for previewing the document using the app.
There are four core functions that Preview can serve Mac users, which include:
- Fill out the PDF forms and add a signature to it
- Add a password to the confidential PDF for protecting the content security
- Merge several PDF documents or pages into a single file
- Convert images (JPEG, PNG, PSD, and TIFF) to PDF or other file formats
Do you get more familiar with Preview? In the following, the details of using Preview to edit a PDF document will be introduced. Continue on reading and start editing your PDF document with the guide and this useful PDF editor!
How to Add Text to PDF on Mac
Normally, when the PDF document is opened in Preview with Mac, you should check whether there have already contained the editable text fields. For example, if the PDF is a business form that is required to fill in, the form label will be set as an editable file. If you click on it, you can directly type the text for adding whatever content you need to fill in.
However, you would wonder to add text to PDF when there have no editable fields? Create it! Preview provides such a tool for assisting in adding text to the PDF content. Here are the simple steps you need to follow.
Step 1. Please move to the top of the interface for accessing the Show Markup Toolbar button, it resembles a pen image inside a circle.
Step 2. Select the T option. Subsequently, a text box will be brought to you.
![]()
Step 3. Move the cursor to the spot on the PDF content where you consider adding text.
Step 4. Click it and the editable field will be added there. Then just double-click the added text box and you can type the texts you need to add to the PDF.
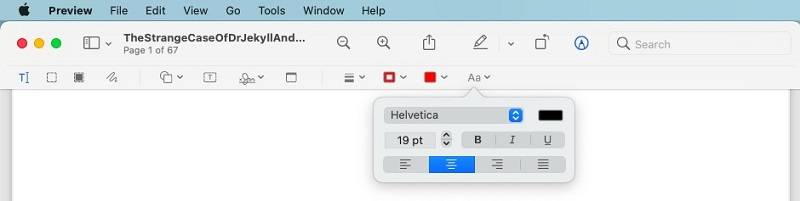
When you are adding the texts, there will provide a Text Style option on the editing bar, by utilizing which you can adjust the layout of the text such as its size and color. After complete adding texts, remember to save the changes and or output PDF as an extra file.
How to Add a Signature to PDF
Are you a businessman who needs to add a signature to PDF regularly? Preview also brings such a feature to those who have this need. You can easily create a signature for adding to PDF following the easy steps described below.
Step 1. First, move to the menu and you can discover the Signature icon. Please click it.
Step 2. In the drop-down menu, select the Create Signature option.
Step 3. You are able to directly add the signature by writing on your trackpad. Despite this, you can handwrite the signature using a thick black pen on paper, then hold it to the camera for adding.
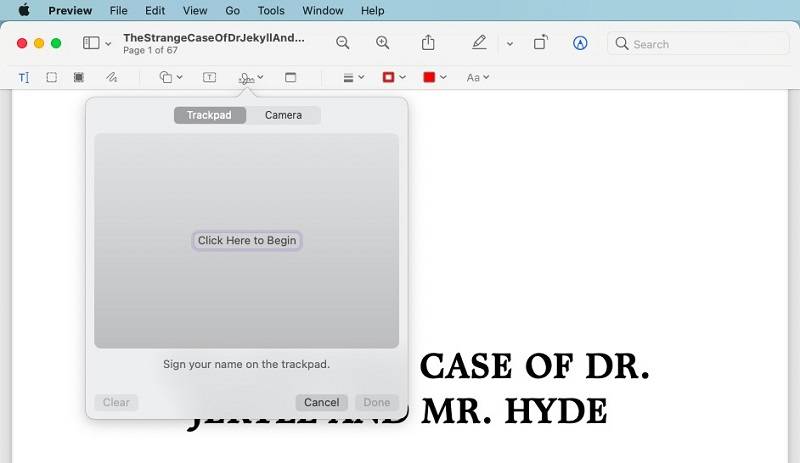
Step 4. No matter which way you choose, please click on Done for adding it. Then you are able to choose the newly-added signature and drag it to the place in the PDF for adding your signature.
How to Add Notes or Comments to a PDF
For people who have reading habits like adding notes or comments to the reading content, Preview carefully considers and provides a useful feature that will allow readers to add notes and comments to a PDF while reading. Let's see how this works.
Step 1. After the markup toolbar revealed in Preview, please move there for finding the Note option, which is located next to the Signature icon.
Step 2. After clicking on the Note icon, the text box will be added to the PDF where you have highlighted. You will have unlimited space for adding the texts you need to write.
Step 3. When completing editing the note, click on other places in the PDF and the yellow text box will smaller its size to a small yellow square. Next time, you need to click on the small yellow square to present the content.
How to Add Shapes to a PDF with Preview
For highlighting the content in a PDF, Preview also encourages people to do this by adding different shapes to the PDF. To make the content stand out by adding shapes, these steps you need to follow.
Step 1. On the left side of the markup toolbar, click on the icon which resembles a square and a circle.
Step 2. In the drop-down menu, you will get several optional shapes to select from. Choose your preferred one and it will be added to the PDF immediately.
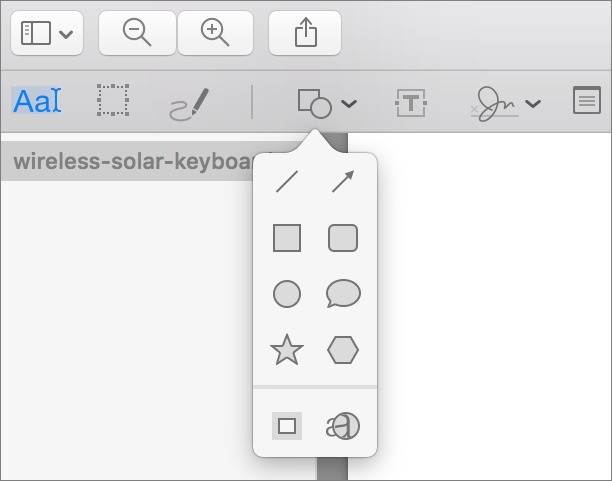
Step 3. Now you only need to resize the shape by dragging its borders. By clicking on the lines of the shapes, a color pallet will pop up for redeciding the color. Select your favorite color for determining the appearance of the shape!
How to Rearrange or Add Pages to PDF on Mac
Preview also allows Mac users to customize the order of the pages in PDF documents easily. To rearrange or add pages to PDF, you only require 3 easy steps.
Step 1. By clicking on the View Menu on the top of the Preview interface and select the Thumbnails option, subsequently, a sidebar will show up on the left side inside the app with all PDF pages listed here.

Step 2. To rearrange the order of the pages, simply click on the page thumbnail for moving it to the right place you consider.
Step 3. For adding pages, launch Finder and access the PDF document you need to add. Subsequently, simply drag it to the sidebar, and the pages can be added successfully.
How to Reduce Size of a PDF File
Reducing the size of the PDF files would always be useful, for example, the file uploading or transferring speed would be faster if you want to share it with your friends, moreover, it won't occupy large space for storing on your Mac. To fulfill such demand, Preview sets a size-reducing feature while saving the PDF file. You only need several easy steps to reduce the size of a PDF file before outputting it.
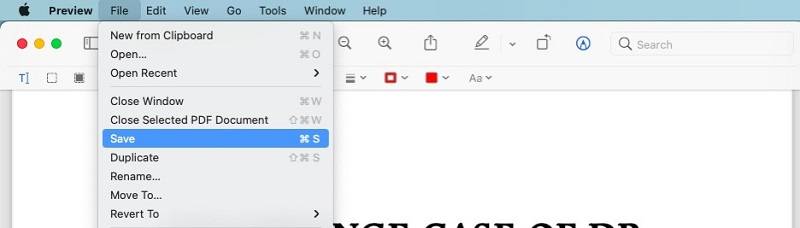
Step 1. After editing the PDF file, click on the File on the top of your Mac screen, then select Save from the menu.
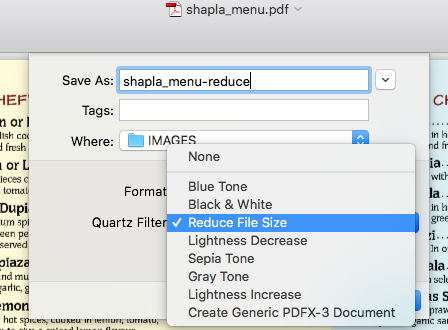
Step 2. When the output window pops up, you can easily discover the Quartz Filter, click the drop-down arrow and there will be a Reduce File Size option provided.
Step 3. Submit Save and the outputted PDF document will be saved with a smaller size.
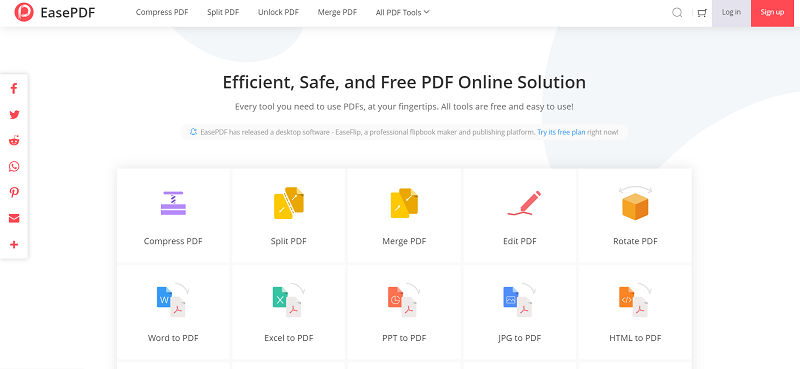
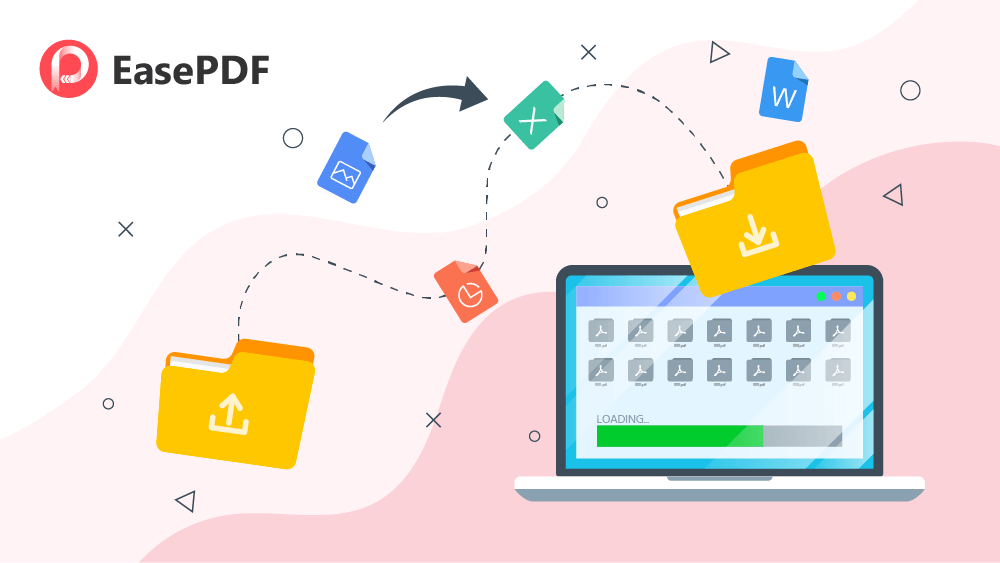
An All-in-one Online PDF Editor - EasePDF
Although Preview brings convenient and free functions for people to edit PDF files without paying a penny, it doesn't include as many functions as those professional PDF editors. To complete the lacking features (such as the powerful PDF converters) of Preview, users can also take EasePDF, a third-party online PDF editor as a backup plan for urgent demands.
EasePDF empowers reliable online converters as well as PDF editors to fulfill different people's needs in managing their PDF files. This online platform brings sparkling advantages for people to rely on while having the demands to convert or edit PDF.
Advantages of EasePDF
- Empower speedy performance to process PDF conversion and edition
- Easy-using steps to manage PDF files online without software
- Ensure data security by applying the 256-bit SSL Encryption to all your uploaded files
- Embed the automatic deletion feature to remove uploaded files in 24 hours for ensuring user privacy
- Accessible on all platforms such as Windows, iOS, and Android more than Mac
Free Version Available
EasePDF offers a free version for users to freely edit and convert PDF files online. However, it will add several small limitations to you, for example, you can only convert or edit PDFs under 50 pages and are smaller than 10 MB.
To unlock such limitations, the Premium Plan with a reasonable price is available for subscribing! It costs only $3.33 per month ($39.95 per year) to use EasePDF without any restrictions! If you have experienced the free trial for ensuring that EasePDF can bring you the best help, why not subscribe to the Premium Plan for using it without worry?
For Mac users, Preview app is an economical and convenient way to edit PDF because you don't have to install third-party software. Its easy-using functions also make many Mac users stick to the app. When they need more PDF tools, EasePDF can always standby for providing free online services without complicated requirements such as extension installation. Therefore, these two tools are both helpful options for editing your PDF files on Mac.
Was this article helpful? Thank you for your feedback!
YES Or NO