In our daily work and life, in order to download files and transfer files faster, some people generally transferred in the form of zip files. Zip files can contain either one file or many files of various sizes in them. The only way to unzip and extract the contents of the archive file is to use the unzip software.
If you are using Mac operating systems, you probably already have the unzip software. But if you wish to open or unzip them with other programs, you can also download third-party programs. Now, we will provide you some software which can help you unzip files on Mac fluently.
Contents
Part 1 - Use Mac Built-in Program: Finder
Part 2 - Use Third-Party Software 1. Unarchiver 2. WinZip 3. iZip
Part 1 - Use Mac Built-in Program: Finder
Finder application in Mac is similar to a file manager which can allow you to compress and decompress files in a simple way. Zipping and unzipping files is a built-in feature on your Mac. On Windows, you typically need a third-party application for the operation, but every Mac has this feature built-in, making it a super simple process. But by default, the Finder only supports compress files into ZIP format, and extract files into zip, tar.gz, BZ2, and other formats.
Step 1. Navigate to the lower-left corner of the screen and open Finder.

Step 2. Then find the zip file that you want to unzip on Mac. Navigate to the archive in the Finder app and double-click the Zip file. After several seconds, the file or the folder will decompress in the same folder.
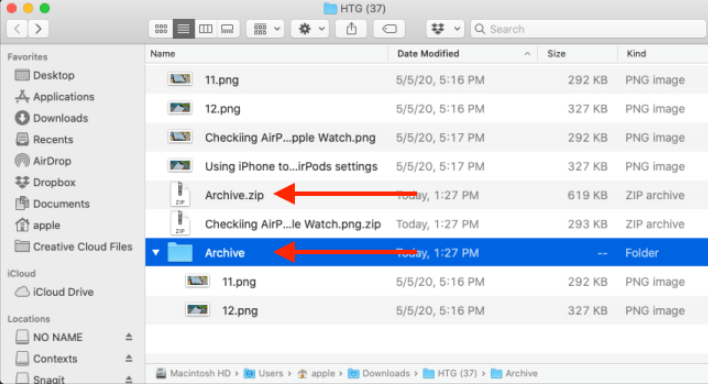
Tips
"If the Zip file just contains a single file, when you unzip it, you will see that the file is restored to its original state with the same name. If you want to unzip a file containing multiple files, it will appear as a folder with the same name as the archive."
After reading the above methods, I believe that everyone knows how to unzip files on Mac with Finder. In daily life, we also need to zip files, so how to zip files on Mac and how to create a zip file on Mac without installing any third-party software? Zipping a file on Mac is just as easy as unzipping one.
Step 1. Open the "Finder" application on your Mac computer.
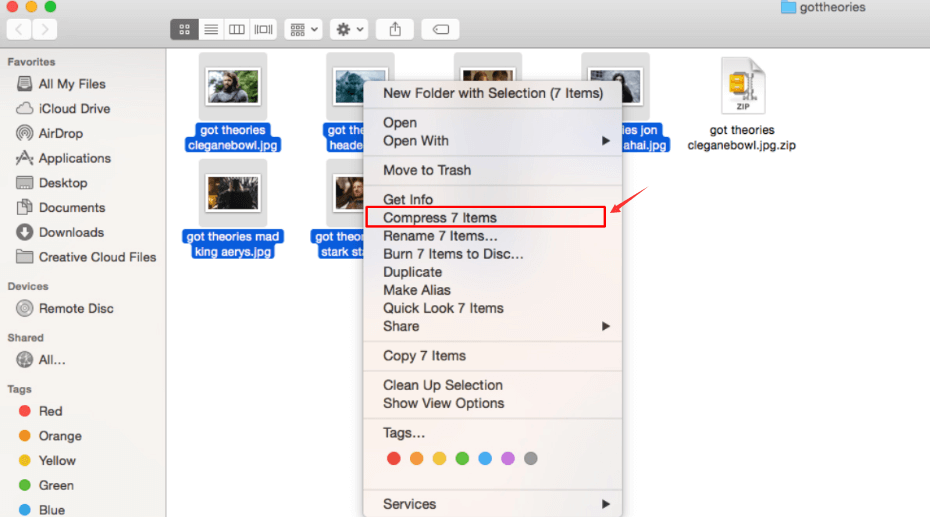
Step 2. Select the files or folders that you want to zip. If you're selecting multiple files, hold the "Command" key while selecting the files. Once you've made the selection, right-click on any selected file then choose the "Compress" option.
Step 3. Once the compression process is finished, you'll see a new compressed file with a ".zip" extension in the same folder.
Part 2 - Use Third-Party Software
With the built-in program on Mac, you can just unzip and zip some kinds of files like zip format. If you receive a RAR file, how can you unzip it? Here are some third party programs which can help you unzip all kinds of file.
1. Unarchiver
Unarchiver is an app for you to open a zip file on Mac. It is more powerful than the native macOS utility and supports infinitely more archive formats. It just takes you a few clicks to install and set it as a default app for all archive files.
Step 1. Launch the Unarchiver program. If you don't have this software, you can download it from Mac's App Store.
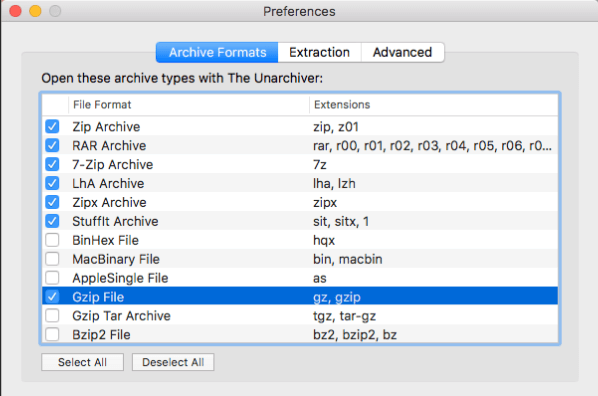
Step 2. Then it will show up a pop-up window, you can select the types of files you want the Unarchiver to unzip for you. The most common types are already selected.
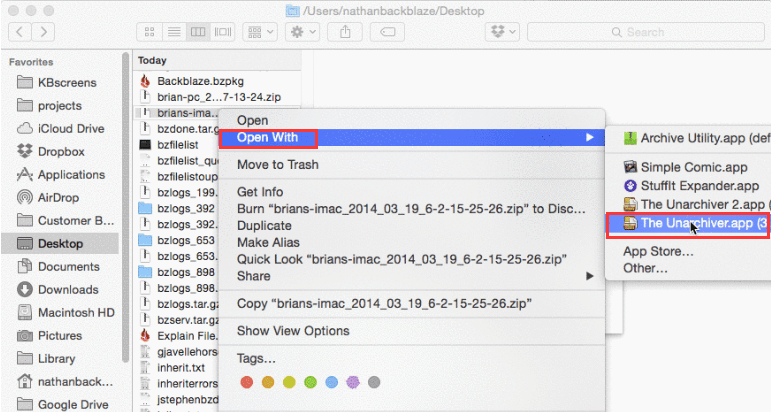
Step 3. Right-click on the zip file, select "open with" and choose "The Unarchiver". You can then create a new folder to place the files in.
2. WinZip
WinZip is a file manager. With WinZip, you can zip, protect, manage, and share all your files quickly and easily. When you working with large files - zip, unzip, protect, share, and more on Mac, WinZip is the best choice for you. It not only can protect files with banking-level AES encryption but can also share directly with iCloud Drive, Dropbox, Google Drive, and ZipShare.
Step 1. Open WinZip, if you don't have this program, you can download it from the above link.
Step 2. Click the "File" > "Open Zip File".

Step 3. From the drop-down menu, choose to unzip your files to this Mac, iCloud Drive, Dropbox, or Google Drive.
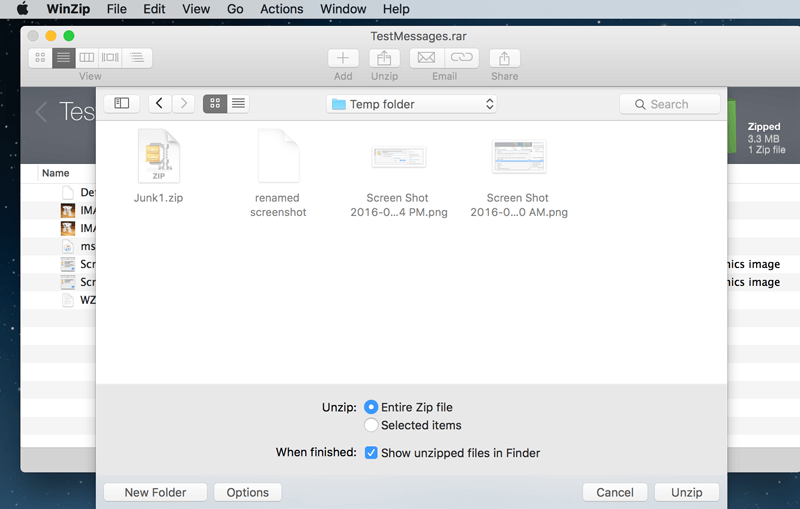
Step 4. Then a "Finder style" window will open. You can browse to the folder where you want the files saved.
Step 5. Choose to unzip the entire Zip file or "selected items". You can also choose to display uncompressed items in the Finder. Another option is to click the "New Folder" button to create a new folder.
3. iZip
iZip is the easiest way to manage ZIP, ZIPX, RAR, TAR, 7ZIP, and other compressed files on your Mac. All the functions in iZip are completely free so you can zip and unzip your files without limitations.
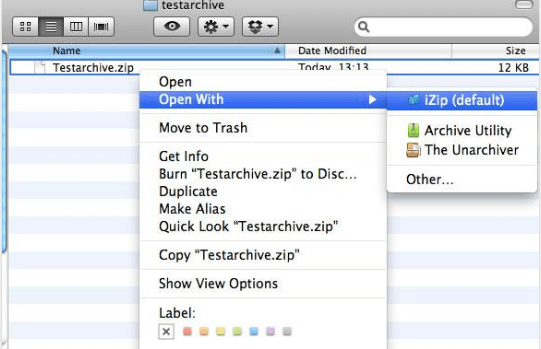
Step 1. If iZip is the default program for opening .zip files, double-click the .zip file in Finder. If iZip is not the default program for opening .zip files, right-click the file, and then select "Open with" > "iZip".
Step 2. Then iZip will open the archive and displays the contents in a Finder window.
FAQ
How to create a zip file on Mac?
You can use the method we provided above to create a zip file on Mac with Finder. Using the third-party program is also supported. Read the "Creating An Archive on Mac with iZip" article to know more on how to create a zip file with iZip software.
Conclusion
We have listed some ways on how to unzip the file on Mac. You can use the Finder to unzip it without installing any software. Using a third-party program like Winzip is also supported. If you have methods of your own you'd like to share, you can comment below.
Was this article helpful? Thank you for your feedback!
YES Or NO