Preview is the image viewer and PDF viewer of the macOS. It enables users to view and print digital images and PDF files. Preview uses Apple's implementation of the PDF specification. It has a simple interface so it is very suitable for newbie.
Many Mac users don't know how to use the Mac Preview, they just use it to view PDF or image files. But it has more functions waiting for you to explore. This article will teach you how to sign PDFs, edit images, and more in Preview.
Contents
Section 1 - View and Print PDFs and Images 1. View PDF and Images 2. Print PDF and Images
Section 2 - Edit PDFs 1. How to Crop PDF in Preview 2. How to Combine PDF 3. How to Sign PDF 4. How to Add Texts in PDF
Section 3 - Edit Images 1. Resize, Rotate or Flip Image in Preview 2. Annotate Images in Preview
Section 1 - View and Print PDFs and Images
Viewing and printing PDFs and images is the most basic function in Preview. For Mac users, you do not need to download other software, as long as you use the built-in Preview software and can view and print the PDF files or images directly.
1. View PDFs and Images
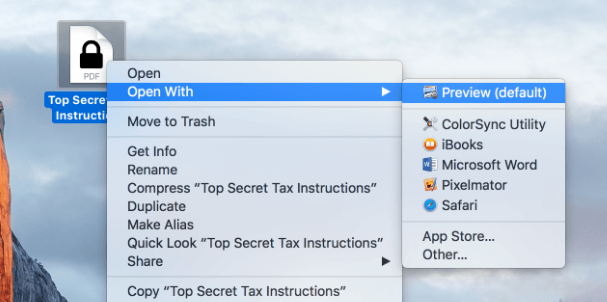
Step 1. Open the Preview on your Mac computer. Choose the "File" > "Open" to open the PDF or image in the Preview app on the Mac. Or you can select the file and right-click on it to open and view the file with Preview.
Step 2. When you open a PDF with multiple pages, you can view thumbnails of all pages in the sidebar. To view a PDF page, you need to click on its thumbnail.

Step 3. You can click on "Tools" > "Show Inspector" to view information about the document or image, such as file size, author name, and image resolution. Zoom in or out of the picture is also supported in this step.


2. Print PDFs and Images
Step 1. Open the Preview software and click the "File" > "Open" to open your image or PDF that you need to print.
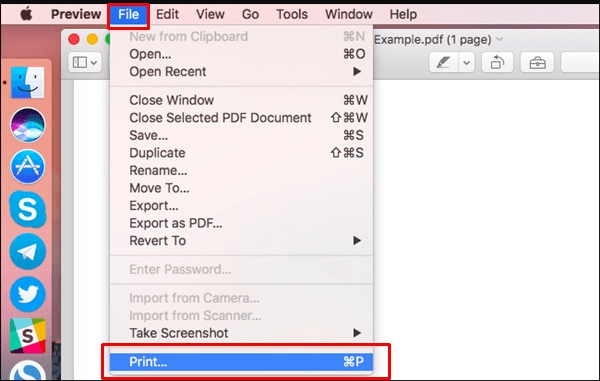
Step 2. Go to the "File" > "Print…" and then choose the print options.
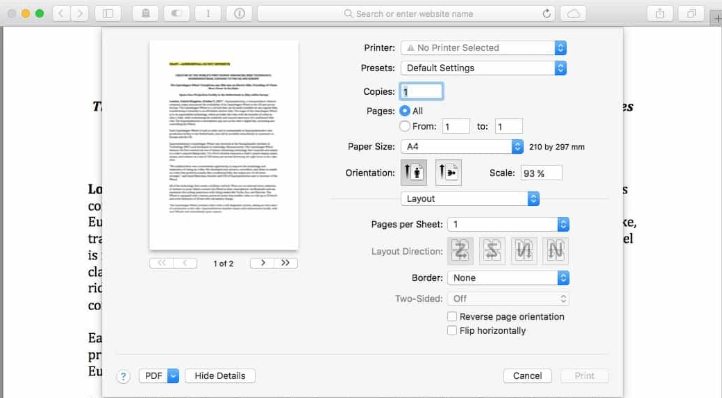
Step 3. In the setting box, you can set the paper size, orientations, and so on according to your needs. When you finished, click the "Print" button.
Section 2 - Edit PDFs
Preview can not only view PDF but also can edit PDF. Next, we will teach you how to edit by listing some commonly used tools.
1. How to Crop PDF in Preview
Step 1. Open the PDF that you want to crop in Preview.
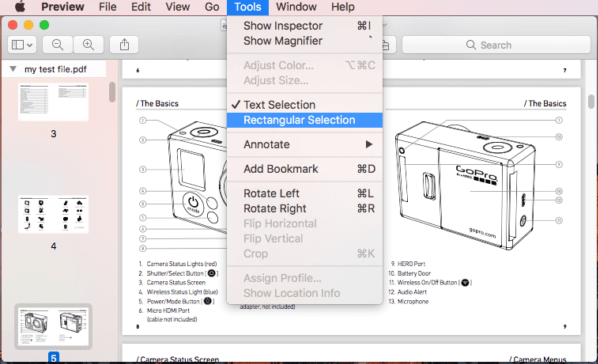
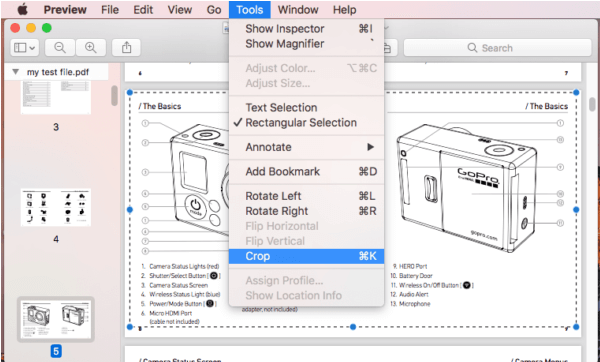
Step 2. Go to the "Tools" > "Rectangular Selection" to select the area you want to crop.
Step 3. After the selection, click the "Tools"> "Crop". Then the PDF will be cropped in Preview. Choose the "File" > "Save" to save your new PDF.
2. How to Combine PDF
Step 1. Open the PDF you want to combine in Preview.
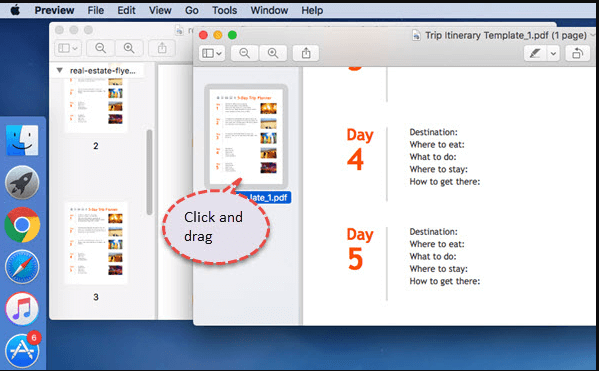
Step 2. Choose "Display" > "Thumbnails" to display page thumbnails in the sidebar. Then drag the thumbnails of the PDF that you want to combine into the thumbnail sidebar of the PDF in order. At last, choose the "File" > "Save" to save your new PDF.
3. How to Sign PDF
Step 1. Double click the PDF you need to sign to open the Preview application.
Step 2. Click the "Tools" > "Annotate" > "Signature" > "Manage Signatures…" to sign your name on PDF.
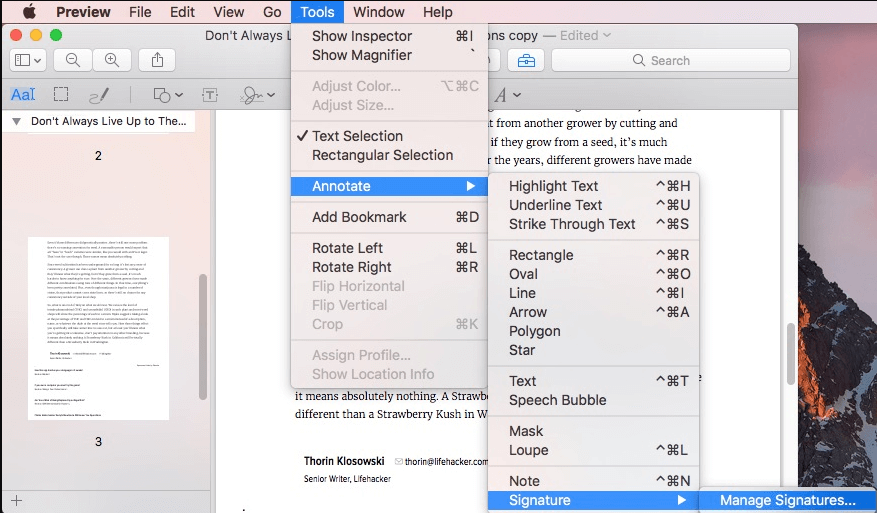
Step 3. You have two options to create signatures. First, you can draw your signature on the trackpad. Second, you can sign your name on white paper and hold it up to the camera. When you finished, click the "Done" button.

4. How to Add Texts in PDF
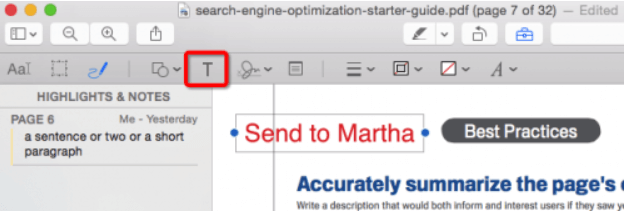
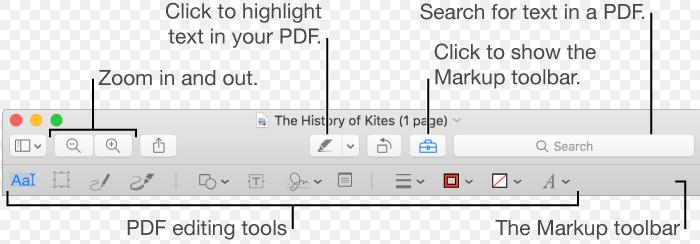
Step 1. Open the PDF document in Preview, and then open up the "Markup Toolbar" by clicking the toolbox icon from the main toolbar.
Step 2. Then it will show up a toolbar. Click on the "T" icon in the markup toolbar then double-click on the text box to change or add the texts in PDF.
Step 3. Highlighting texts, adding notes, adjust texts, and so on are also supported in the editing tool.
Section 3 - Edit Images
Mac Preview app doesn't just contain PDF-editing features. It's also a great little image editor. With Preview, you can edit an image without using other applications like iPhoto or Photoshop. You can adjust the color of an image, crop it, rotate it, and even copy and paste part of an image from one image to another. You can also resize and export images, which is what you might do before sharing photos online.
1. Resize, Rotate or Flip Image in Preview
Step 1. Open the image that you need to be edited in Preview.
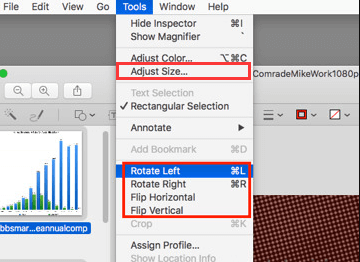
Step 2. After clicking the "Tools" button, you can choose the corresponding to edit your image as you need. You can resize, rotate, or flip your image.
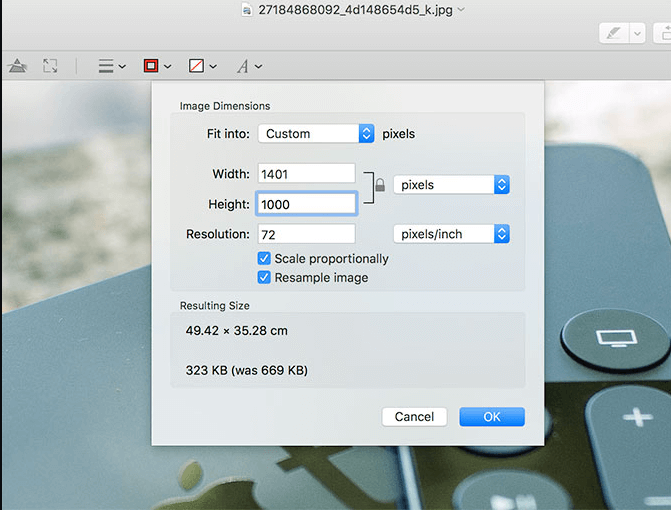
Step 3. When you go into the "Image Dimensions" window, it will support many measurement units, including pixels. You can adjust the width and height in this window.
Step 4. When you finished the editing, clicking the "File" > "Save" button to save the image.
2. Annotate Images in Preview
Step 1. Open the image that you need to be annotated in Preview.
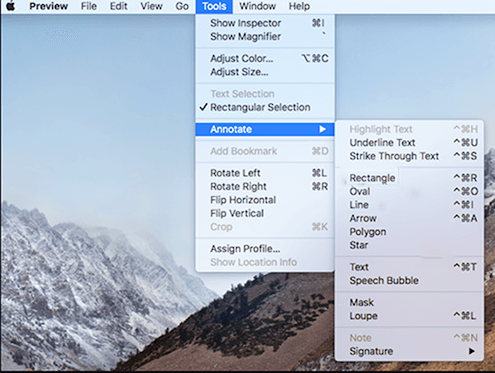
Step 2. Click the "Tools" > "Annotate" then you can see many tools which can help you annotate your image. Click on the type of annotation you wish to perform.
Conclusion
The above has listed several commonly used tools in Preview. It can help you to solve many common problems on how to use Mac Preview. If you want to know more usage on Preview, please leave us a message.
Was this article helpful? Thank you for your feedback!
YES Or NO